WTF!?! Docker asks for Azure AD credentials when sharing C drive

On my Docker quest I was surprised once again. I wanted to share my drive with my Docker container. I was presented with a login dialog that asked for my Azure AD credentials. Azure AD credentials? Seriously? Do I have Azure AD credentials?

UPDATE 9 November 2018

It turns out you do not have to use an Azure AD account for Shared Drives at all. You can just create a local account (i.e. DockerHost) using the instructions below points 2 to 4 .

The confusing part is that the dialog displayed the username as AzureAD\MyName. This didn’t ring a bell. After fiddling around I figured out that I could use my Office 365 credentials, but the username needed to be changed to my email address in the following format AzureAD\[email protected]. Go figure.

After logging in nothing happened and the share was unchecked again. WTF?!?!

After googling around I found the following post Sharing your C drive with Docker for Windows when using Azure Active Directory by Tom Chantler, which gave me enough information to fix the problem.

I had to make to three changes to the solution he describes in his post:

  1. I do not have Azure AD credentials. So I used my Office 365 credentials, which also uses Azure AD. So instead of the username being AzureAD\MyName, I had to change it to AzureAD\[email protected].
  2. I’m running Windows 10 Professional. It initially would not let me create a local users who’s username was not an email address. In the first dialog I needed to select ‘I don’t have this person’s sign-in information’ and in the next step ‘Add user without Microsoft account’. Then I could create the user with the same username (MyName) without the Azure\ prefix.
  3. Change the account type to Administrator.
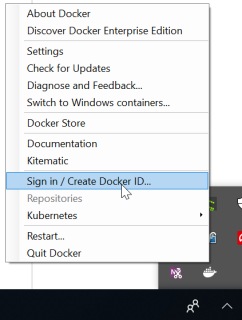
  4. Go to the Docker Settings and select Shared Drives and use the local user account created in the previous step to authenticate. It should work now.


After that the C drive was shared. Whooha!

Docker: incorrect username or password

I’m reacquainting myself with Docker. My first steps were dodgy. I immediately ran into problems testing if Docker was installed correctly on my Windows 10 machine, when I wanted to execute the hello-world image.

docker run hello-world

Which threw the following error.

Unable to find image 'hello-world:latest' locally
docker: Error response from daemon: Get https://registry-1.docker.io/v2/library/hello-world/manifests/latest: unauthorized: incorrect username or password.
See 'docker run --help'.

It turned out the problem was that I was a little to eager when I signed into the Docker Hub in the Docker Settings.

Screenshot

After logging out with the following command it worked.

docker logout

Go figure…

Using Git with SSH key on Windows

Just a quick write up as reminder how to generate a SSH key on Windows and use it with Git. Git comes with OpenSSH which includes ssh-keygen. Of course you can use Putty to generate SSH keys, but why not do it the quick and easy way with Git? If you use Putty you need to convert the generated key from Putty format to the standard SSH format.

Okay lets get started. Follow along with the following steps.

1. Make Open SSH utilities accessible

Add the Git directory containing the OpenSSH command line utilities to the Windows Path. They are installed in the following location.

C:\Program Files\Git\usr\bin

You can do this the traditional way using Windows Control Panel executing the following steps.

  • Pressing the Windows key to open up the Start Menu
  • Search for “advanced system settings” (just start typing)

Alternatively you can browse through the Control Panel.

  • Select System and Security
  • System
  • Click on the Advanced system settings hyperlink in the left hand pane

Or do it the easy way if you have Rapid Environment Editor (RapidEE) installed. Use the following command line from a shell with administrative privileges to add it to the system wide path (for all users) or leave out the -M flag to add the variable to the user path.

rapidee -A -M Path "C:\Program Files\Git\usr\bin"

2. Generate the SSH key pair

NOTE: If you want Git to work with the generated SSH key pair without any further configuration then accept the default location and name of the SSH key pair.

An SSH key consists of a private and public key. The private key should be stored safely, the public key can be shared with others. Don’t forget to set a passphrase for your private key. The passphrase prevents unauthorised usage of the private key by protecting the key itself with a password. Although the directory holding the private keys should be inaccessible to other users, the root user of the system, or anyone who can access the private key can copy and use it if not protected by a passphrase.To add a passphrase to a key just type it when prompted during the key generation process. Keep in mind that the password must be at least 5 characters long. A good passphrase should be at least 10 characters long, and consist of random upper and lower case letters, numbers and symbols.

Generate the SSH key pair with the following command.

ssh-keygen -t rsa -b 4096 -C "nidkil-git-key"

The -t is the key type, -b is the key length (the higher the more secure) and -C is a comment that is added to the key which makes it easier to identify. The comment is added to the end of the key. Don’t believe me? Open the public key file and you will see your comment. Handy isn’t it?

3. Use the SSH public key

If you did not change the default location and name, the SSH key pair can be found in the directory .ssh in the users home directory.

That’s all fooks. Have fun.

Accessing home folders from Windows Subsystem for Linux in Explorer

Are you running Windows Subsystem for Linux (WSfL)? Ever wondered where the home folders are stored so that you can access them from Explorer? Seek no further for here is the answer.

Every distribution has it’s own location. They can be found under:

%LOCALAPPDATA%\Packages

For Ubuntu 18.04 you can find the home folders in the following location:

%LOCALAPPDATA%\Packages\CanonicalGroupLimited.Ubuntu18.04onWindows_79rhkp1fndgc\LocalState\rootfs\home

Enjoy!

Change root password Windows Subsystem for Linux

Today I was setting up Windows Subsystem for Linux and wanted to change to the root user using the command:

su -

I was prompted for the password, but had no idea what it was. So I needed to figure out another way of switching to the root user instead of prefixing every command with sudo. Did I say switch and prefix and sudo? O yes, stupid me.

sudo su

Don’t forget to exit once you are done. And be careful not to wrech havoc while working under the root account. Have fun!

Plugin Manager removed from Notepad++

I needed the compare plugin today. You used to be able to select the Plugin Manager under Plugins -> Plugin Manager. But it was gone 😦 It turns out it has been removed from the standard installation and has to be installed separately. I haven’t been able to find out why. Here quick instructions how to install Plugin Manager.

  • Download the latest version of Plugin Manger from GitHub. Make sure you download the correct version 32 or 64 bit depending on the version of your operating system.
  • Unzip the file.
  • Copy the two directories to the Notepad++ directory. In my case C:\Program Files (x86)\Notepad++.
  • Restart Notepad++.

Plugin Manager is available again under Plugins -> Plugin Manager. Yeah!

Surface Pro 4 shutsdown when I click the on/off button

When I pressed the on/off on my Surface Pro 4 running Windows 10 it would shut down! Really irritating.

After searching around for a while I found the setting under System Settings that controls the behavior of the on/off button.

  • Open Control Panel > Power Options > System Settings
  • Change the action when the on/off button is pressed to ‘Sleep’.

That’s it. Another problem solved!